![]() Kdenlive 16.04.1 rather quietly introduced a useful new dialog, to be found in the timeline toolbar: manage cached data. This dialog allows you to see how much disk space your projects each eat up. You can then also selectively clean up project-cached data when you don’t need it anymore after finishing a project.
Kdenlive 16.04.1 rather quietly introduced a useful new dialog, to be found in the timeline toolbar: manage cached data. This dialog allows you to see how much disk space your projects each eat up. You can then also selectively clean up project-cached data when you don’t need it anymore after finishing a project.
Manage Cached Data
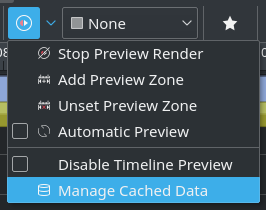
You’ll reach this new dialog via the timeline toolbar preview render button, then Manage Cached Data.
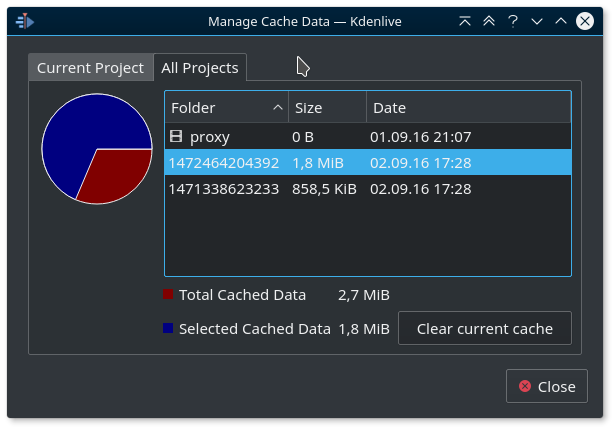
This dialog then features two tabs: cached data for the current project, as well as an overall view on all projects.
Current Project Tab
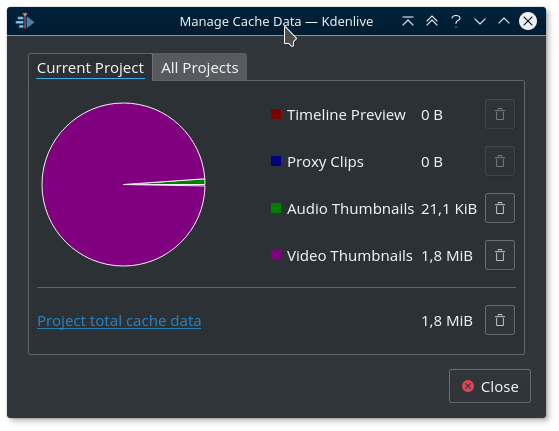
The Current Project tab gives a detail view on your currently loaded project, with a nice pie chart. It shows you at a glance how much space individual elements of your project need for caching; such as: the timeline preview rendering cache, proxy clips, audio and video thumbnails.
Here, you can selectively delete only some cached data by simply clicking on the corresponding trash can buttons.
To remove all cache data for the currently loaded project, clip on the bottom trash can.
Finally, when you click on the link which is left to the bottom trash can, the folder containing the project cache will open in your file manager.
All Projects Tab
The Current Project tab gives a detail view on your currently loaded project, with a nice pie chart. It shows you at a glance how much space individual elements of your project need for caching; such as: the timeline preview rendering cache, proxy clips, audio and video thumbnails.
Here, you can selectively delete only some cached data by simply clicking on the corresponding trash can buttons.
To remove all cache data for the currently loaded project, clip on the bottom trash can.
Finally, when you click on the link which is left to the bottom trash can, the folder containing the project cache will open in your file manager.
Technical Background
Kdenlive now stores all its caching data XDG-compliant inside a dedicated caching folder, as opposed to the former kdenlive folder. On many systems, you’ll now find the Kdenlive cache data inside $HOME/.cache/kdenlive. Inside this folder, you’ll find a single proxy files folder, as well as multiple project-specific folders.
There is always only a single proxy folder, as Kdenlive creates proxies based on the original video file, independent of any specific project. This way, the same proxy file will be shared between multiple projects using the same source video clip.
In contrast, timeline preview rendering files are always project-specific. Each new Kdenlive project is automatically assigned a unique ident. This ident is basically a timestamp. It allows to preserve the timeline preview rendering data even when renaming or moving a project file. This ident is also used as the name of the folder housing the preview rendering chunks.
The downside, however, is that when you clone a Kdenlive project you need to be careful. At this time, the only way to safely clone Kdenlive projects is to manually edit the clone project using a text or XML editor. Please make sure to change the document id. Look out for a line like this (yes, that’s actually a single line I had to reformat for this blog)…
<property

name="kdenlive:docproperties.documentid">

1464935942651

</property>
…and change the number, for instance, by incrementing it by one.


